
This guide explains how to use Pix Dance to organize your photos efficiently.
Using Pix Dance is easy! Here’s how:
- (Usually only the first time) Set the language and trash folder.
- Select the folder containing the images you want to sort.
- Configure the destination folders.
- While viewing an image, simply click the destination folder icon to sort it.
The screenshots used on this page contain Japanese, but you can switch to English through the settings.
Initial Setup
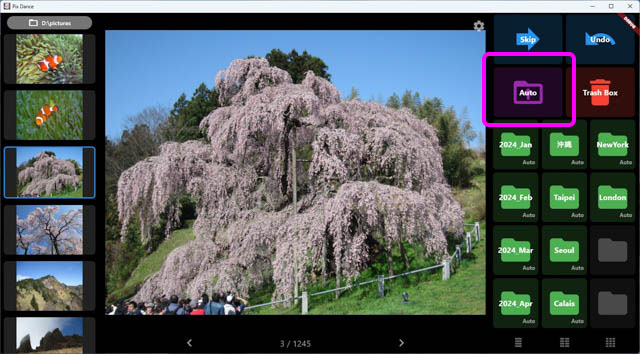
When you launch Pix Dance for the first time, the following window will appear.
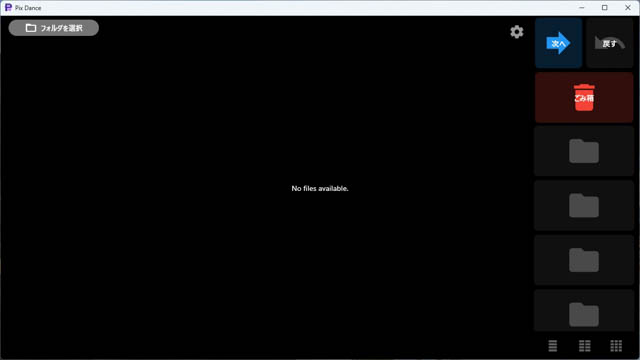
Pix Dance is a single-window application, meaning all operations are performed within this single interface.
(Especially for first-time users) Click the settings icon at the top of the window to configure your initial settings.

The following settings window will appear.
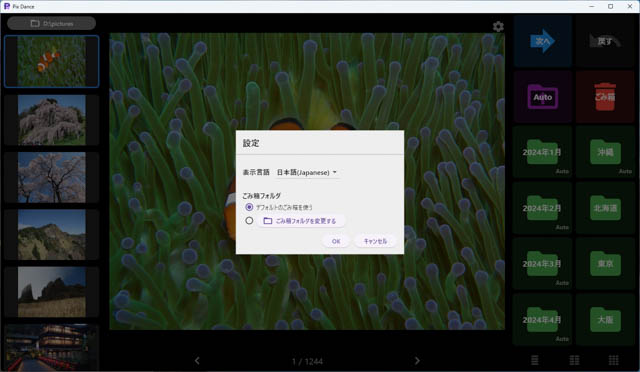
The settings window includes:
- Display Language: Choose between Japanese and English.
- Trash Folder: Use either the default Pix Dance folder or specify a custom folder.
Pix Dance does not use the OS’s standard “Recycle Bin” but instead sets up a dedicated trash folder.
The default Pix Dance trash folder may vary depending on your environment. You can check the folder with “Open Trash Folder” button on the setting dialog.
These settings will be applied from the next launch. (You can modify them anytime.)
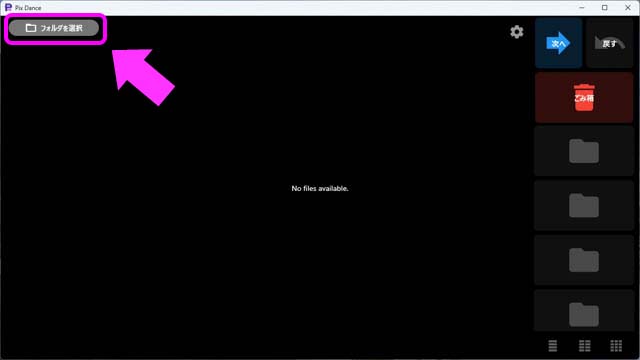
Choosing an Image Folder
To select the folder containing the images you want to sort, click the “Select a folder” button located at the top left of the window.
Once you select a folder, the images within that folder will be displayed as a list on the left side of the screen.
– You can scroll through the list to view all images.
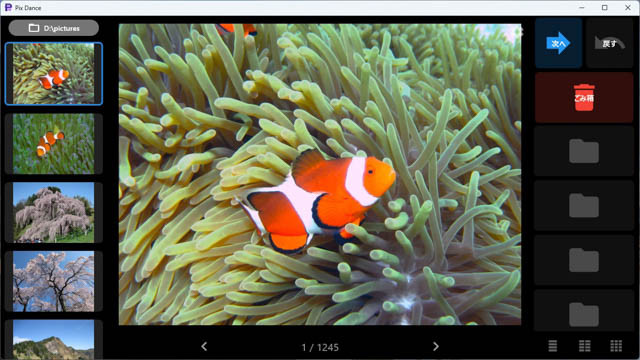
The image displayed prominently in the center is the currently selected (active) image.
– You can change the selected image by clicking on an image from the list on the left.
Sorting or sending images to the trash is performed on this active image.
Once an image is sorted, the next one automatically becomes active and is displayed in the center. (You’ll quickly get the hang of it as you use it.)
Configuring Destination Folders
Next, set up the destination folders for sorting images.
Right-click on the folder icons displayed on the right side of the screen and select “Select destination Folder.”
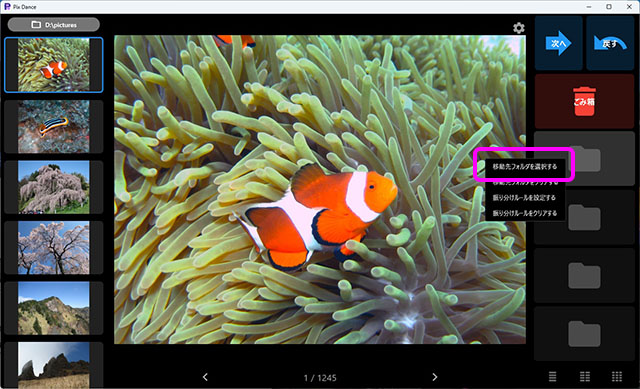
Once a destination folder is set, its icon will turn green, and the folder name will be displayed.。
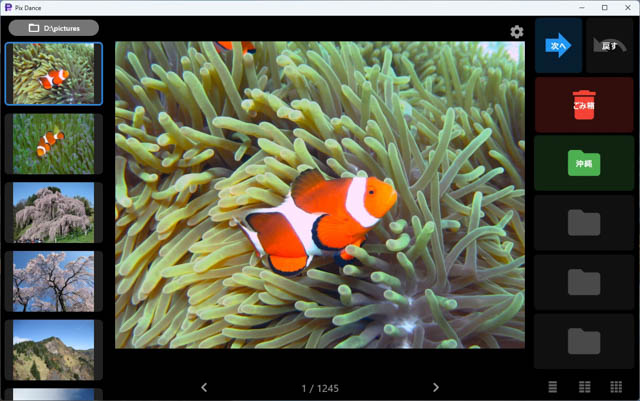
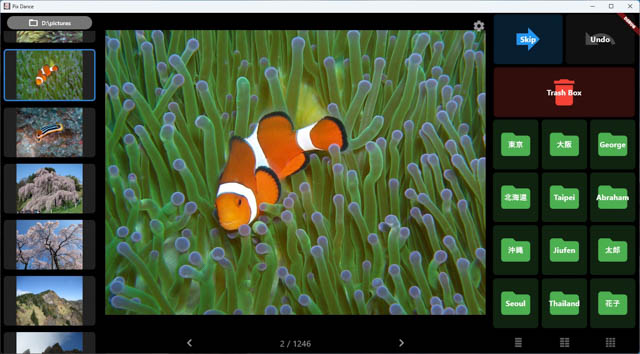
You can register up to 12 destination folders.
You can switch the number of displayed sorting folders between 4, 8, and 12 using the button at the bottom right of the window.
Sorting Images
Once you’ve selected your image folder and configured destination folders, sorting is simple:
- Look at the large image displayed in the center and click the corresponding destination folder icon.
- Once you sort an image, the next one automatically becomes active and is displayed in the center.
If you make a mistake and sort an image into the wrong folder, simply click the “Undo” button at the top right to revert the action.
Deleting Images
Organizing failed shots is just as easy:
- Instead of clicking a sorting folder, click the trash icon to send an image to the trash.
- Clicking the trash icon does not immediately delete the file. Instead, it moves it to the designated trash folder.
If your storage is running low and you need to permanently delete images from the trash:
- Right-click the trash icon.
- Select “Empty Trash”.
⚠ Warning: Once the trash is emptied, the images are permanently deleted and cannot be recovered.
Auto Sorting Mode
Want to save time? Use Auto Sorting Mode to organize photos automatically based on date and location.
How to use Auto Sorting:。
- Set sorting rules for destination folders.
- Click the Auto button.
Although setting sorting rules takes a bit of effort, once configured, all images can be sorted with a single click!
Setting Sorting Rules
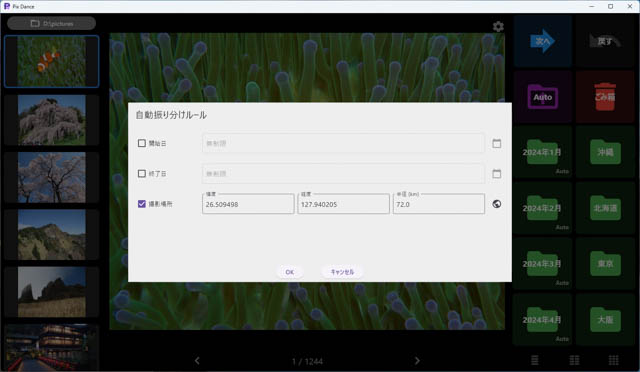
Right-click on a registered folder icon and select “Set distribution rules.”
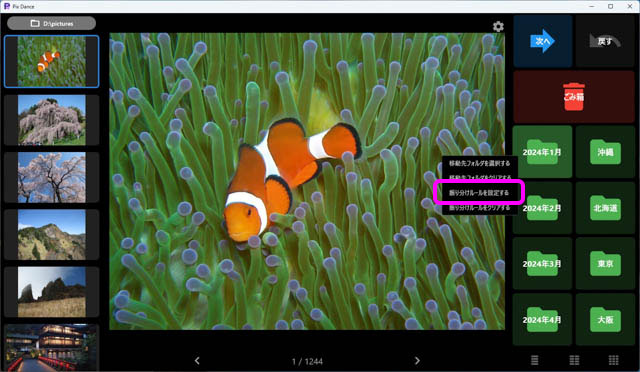
The following settings window will appear.
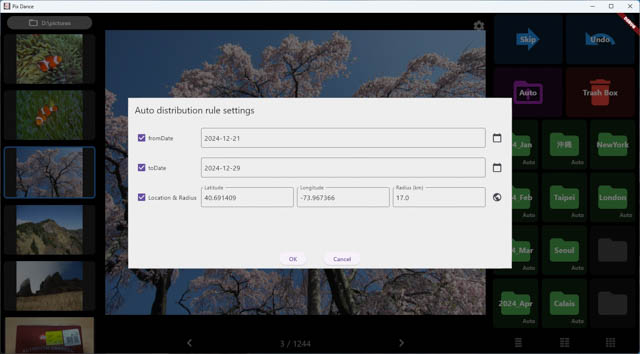
Here, you can set the sorting conditions based on the shooting date and location.
Setting the Shooting Date
Specify a start date and an end date.
For example:
- If you set Start Date: January 1, 2024, and End Date: March 31, 2024, then this folder will receive images taken between January and March 2024.
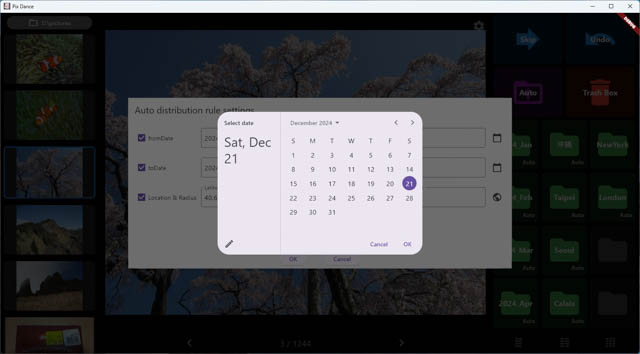
You can enter the date manually in yyyy-mm-dd format or select it from the calendar by clicking the calendar icon on the right.
Setting the Shooting Location
Location-based sorting is available only for images that contain GPS metadata.
(For example, images taken with a smartphone may have location data.)
You can define the sorting area using latitude, longitude, and a radius from the specified location.
Click the globe icon next to the input field to open a map-based selection window.
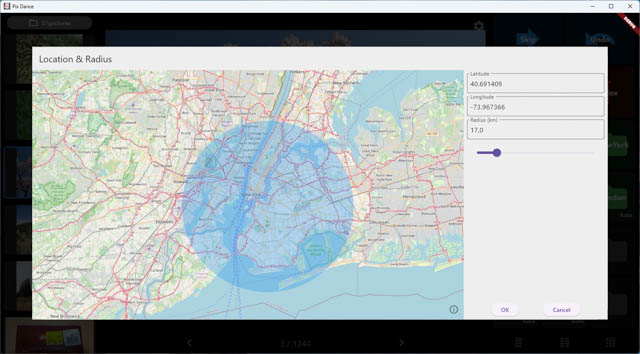
Click on the map to set the latitude and longitude.
Adjust the radius using the slider on the right side of the window.
Executing Auto Sorting
Once at least one folder has sorting rules set, the “Auto” icon will appear next to the trash icon.
Click the Auto icon to automatically sort all images into the corresponding folders based on the rules.
Images that do not match any sorting rules will remain in their original folder.